
Before You Begin
- Back up your old device.
- Have your Apple ID and password ready.
- Move your SIM card from your iPhone, iPad, or eSIM to the new device.
- Wipe the data from your old device
Clear Your Tracks
Before you say goodbye to your old device, wipe your data! Your iPhone can expose a great deal of personal information. You’ve used it for everything from making payments, to sending confidential mail, and accessing your personal cloud. To wipe your device before selling it or passing it on:- Go to Settings, then to the General sub-menu
- Choose the Reset option or the Erase All Content and Settings function
- Enter your Apple ID password and continue
Hello CyberGhost VPN!
A new and improved iPhone calls for a new set of cyber hygiene habits. Whatever device you find yourself on, you need CyberGhost VPN there too. CyberGhost VPN encrypts your data and routes it through a secure tunnel. We’ll ensure that no matter what you do online, no one can ever spy on you. Surf the web and use any app with the confidence of having first-rate privacy.Option 1: Using Quick Start
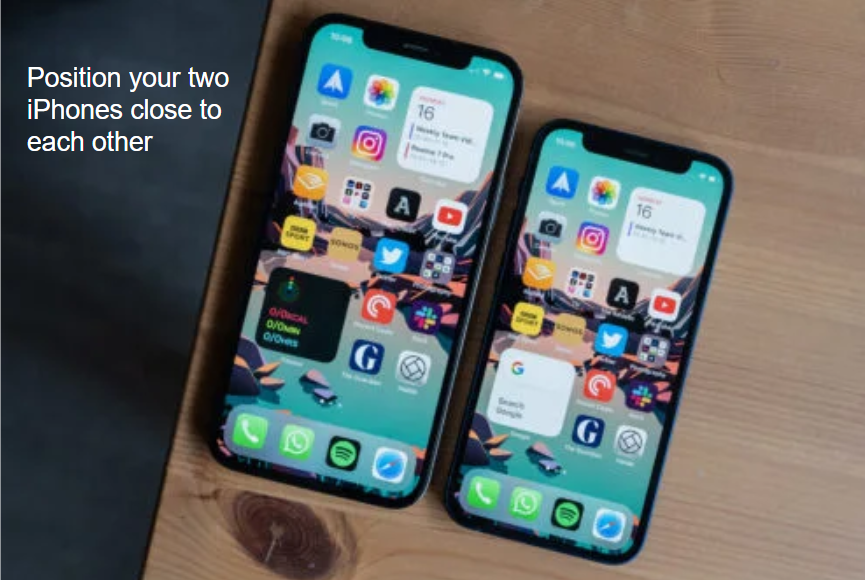
If you have both your old and new iPhone on hand, the easiest way to transfer your data across is with Apple’s Quick Start tool. Pick a time when you won’t need to use your current device as the process may take up to an hour. Here’s how to do it in 6 easy steps:- Turn on your new iPhone and position it next to your old iPhone (also powered on). Turn on the Bluetooth on your old iPhone. Make sure both are plugged in or fully charged as you don’t want them to power down mid-transfer.
- You should see a screen appear on your current iPhone asking if you want to use your Apple ID to set up the new device, hit Continue.
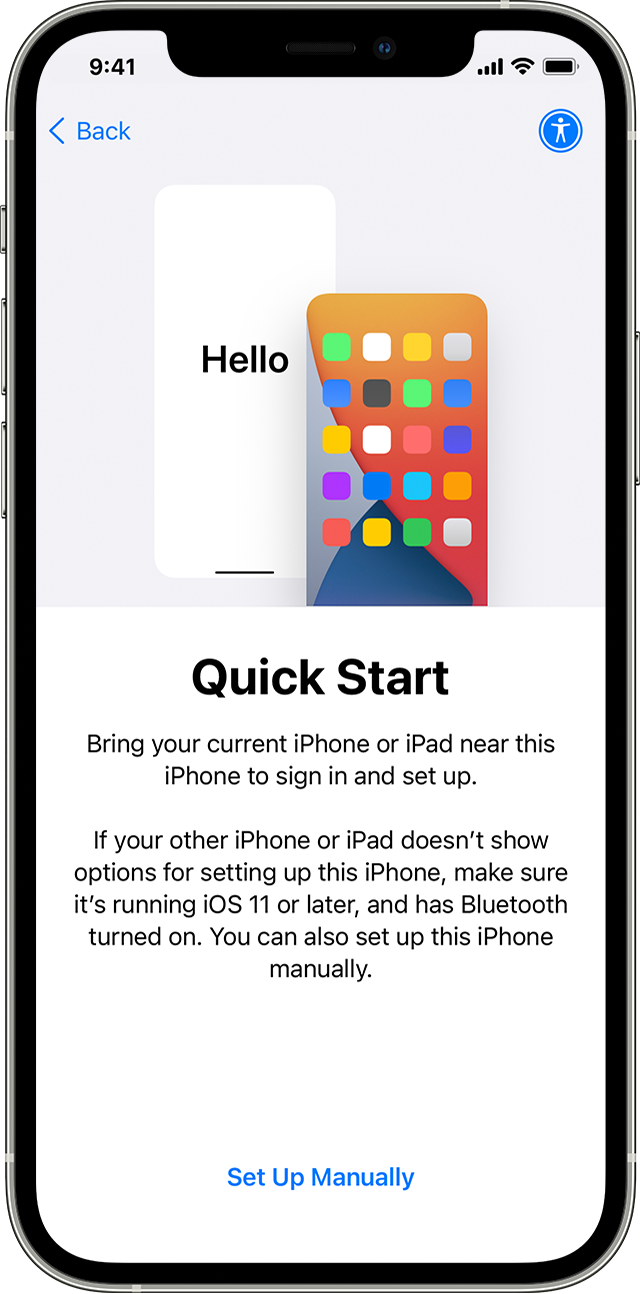
- When the animation appears on your new iPhone, point your old iPhone’s camera at it.
- Wait for a message: Finish on New iPhone.
- You now need to enter your old device’s Apple ID passcode on your new iPhone. You can then follow the instructions to set up Face ID or Touch ID on your new device.
- When the Transfer Data from iPhone screen pops up, tap Continue to begin transferring your data from your old device to your new device. You can also tap Other Options to transfer data from your most recent iCloud backup or from a backup on your computer (discussed later in this article).
Option 2: Using Prepare for New iPhone
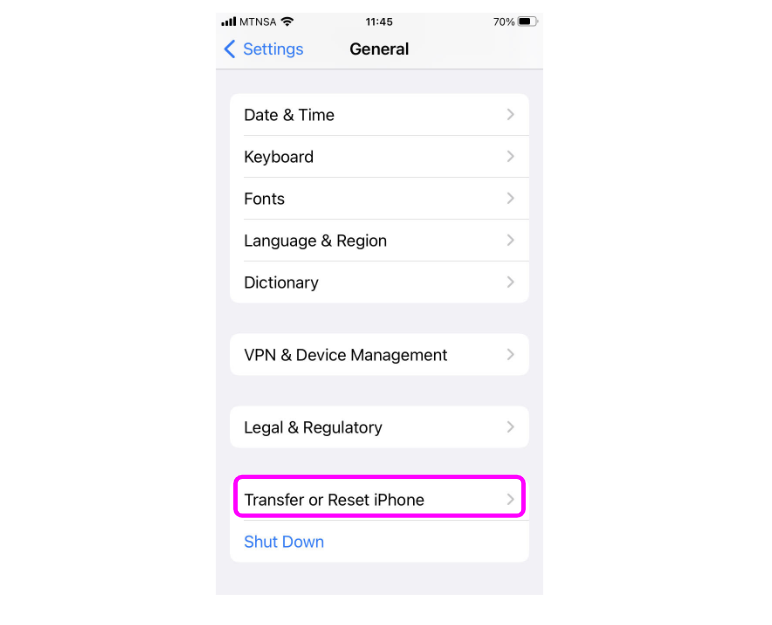
If your new iPhone is running iOS 15, you can use Prepare for New iPhone, an Apple feature that lets you use free iCloud storage space for 21 days to make the jump. This is great if you’re reluctant to pay more to upgrade your iCloud storage plan. You get to use iCloud for free during the transition. It should also speed up the process of setting up your new iPhone. You also don’t need to have both devices on hand. Here’s how you use this feature.- On your current (old) iPhone, go to Settings and tap General. Scroll down to the bottom and select Transfer or Reset iPhone.
- The Prepare for New iPhone feature will open. Tap Get Started.
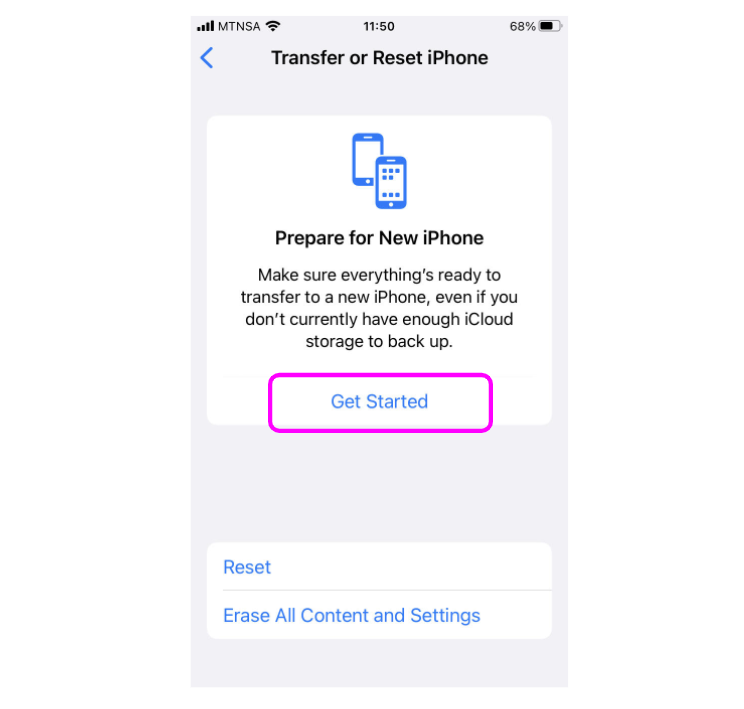
- Once you’ve read the information, hit Continue.
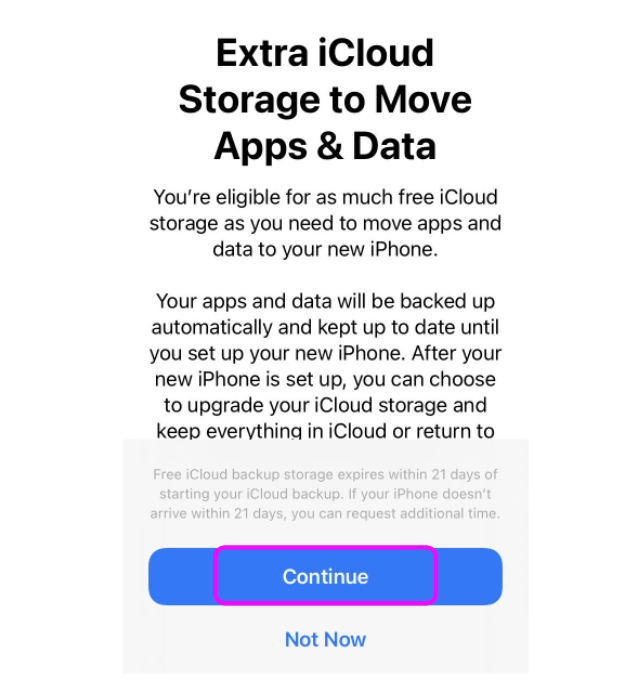
- That’s all for now! Your apps and data will upload to iCloud over the next few hours or days, ready for when your new iPhone arrives.
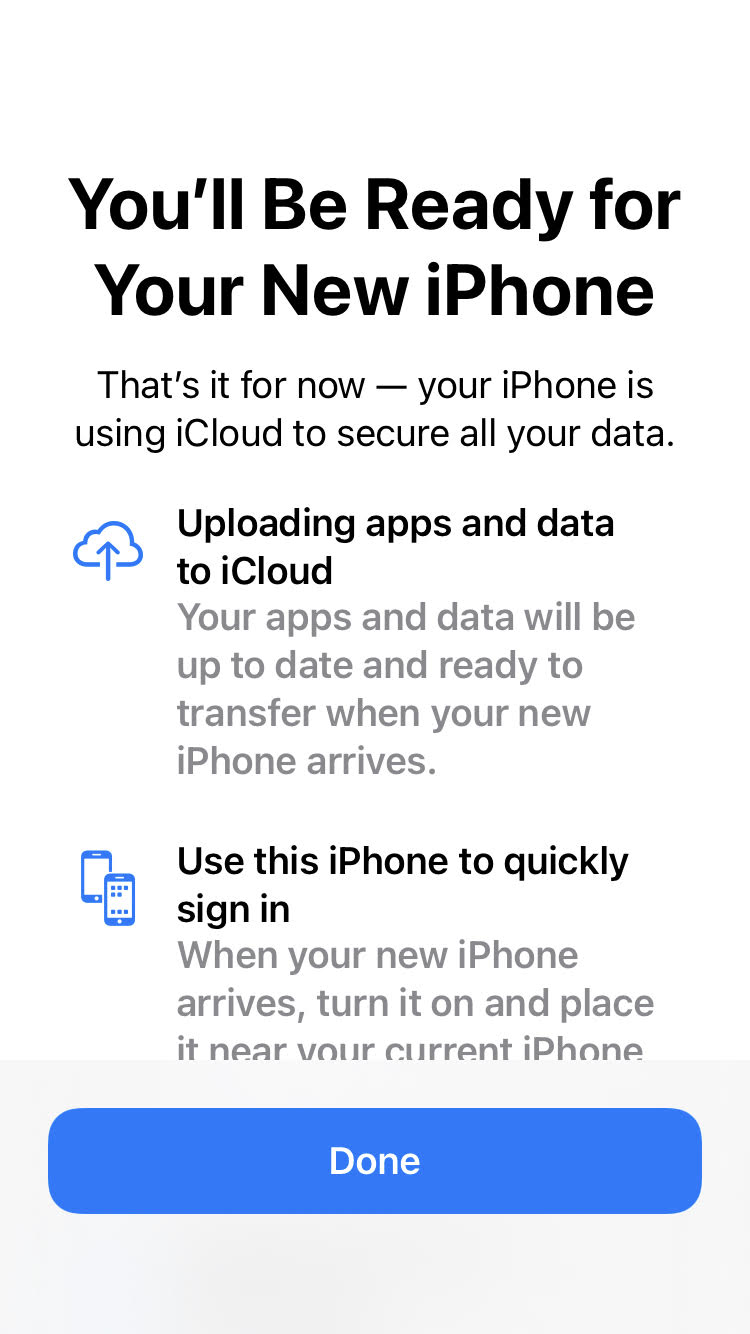
- To transfer data to your new iPhone, you can either use the Quick Start option explained above or restore it directly from iCloud.
Option 3: Using iCloud
You can also use your latest iCloud backup to transfer data from your old iPhone to your new iPhone. Here’s how to back up to iCloud and transfer your iCloud backup to your new device.Back Up Your iPhone to iCloud
- First, connect to a reliable and secure Wi-Fi network. If you’re on public Wi-Fi, make sure you’re connected to CyberGhost VPN first to keep your data out of the wrong hands.
- Open the Settings app and tap on your name at the top, then tap iCloud.
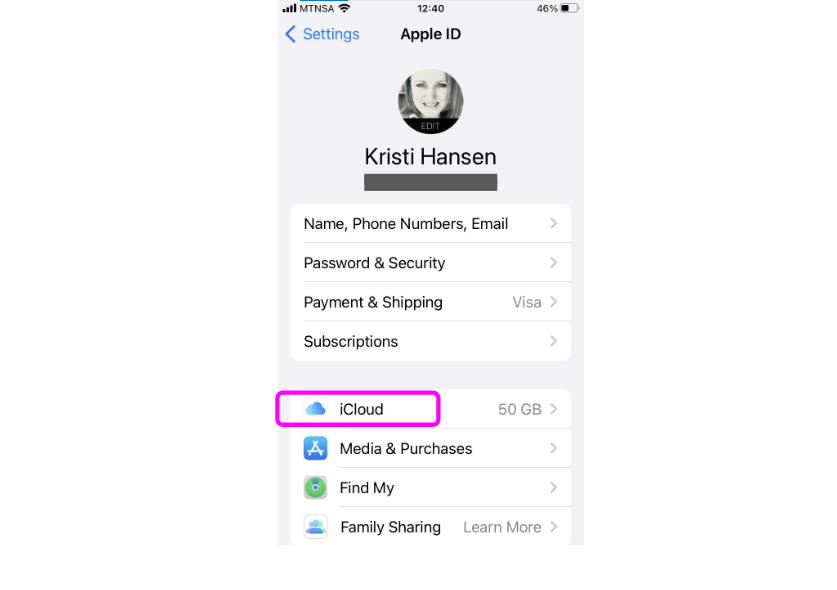
- Scroll through apps and services and select which should be backed up to iCloud.
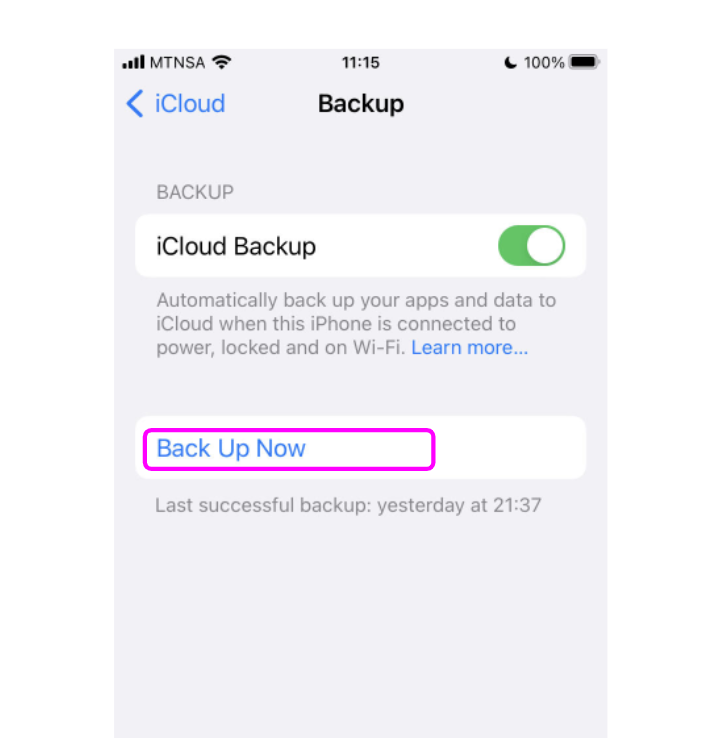
- Then tap iCloud Backup.

- Tap Back Up Now. Stay connected to your Wi-Fi until the backup is complete.
Tips:
- Automatic backups are awesome! Just toggle iCloud Backup on and you can forget about having to remember to back up regularly. iCloud automatically backs up your iPhone daily when your iPhone is locked and connected to both power and Wi-Fi.

- Upgrade your storage: To back up your iPhone regularly, you’ll probably need more than the 5GB storage space that comes with your Free iCloud accounts. To upgrade, tap Manage Storage. You can then choose to pay for either 50GB, 200GB, or 2TB.
Restore iPhone from an iCloud Backup
- Turn on your new or newly erased iPhone (or iPad).
- Follow the online instructions to pick a language and region.
- Tap Set Up Manually.
- Tap Restore from iCloud Backup.
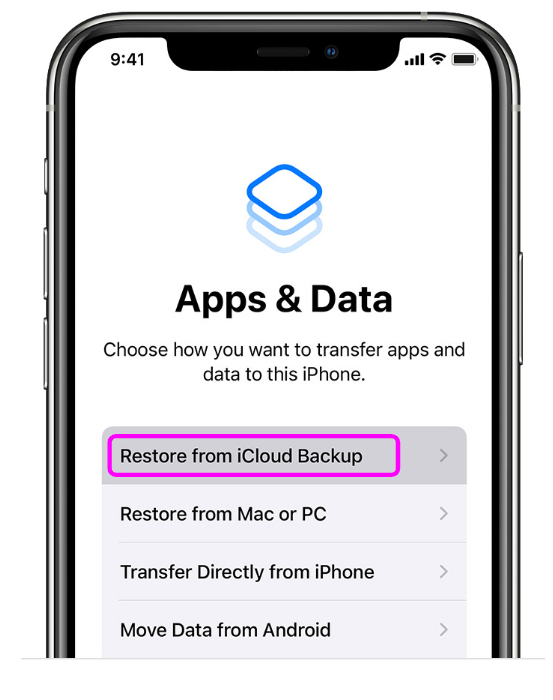
- Sign in with your iCloud Apple ID and select the relevant iCloud backup. Now you just need to hang ten while the data moves over to your new device. Apple’s guestimate of how long is usually pretty close.

Option 4: Using a Computer
You can also use either your Mac or Windows PC to transfer data from iPhone to iPhone. Just make sure your laptop or desktop has a port available for your iPhone’s Lightning cable.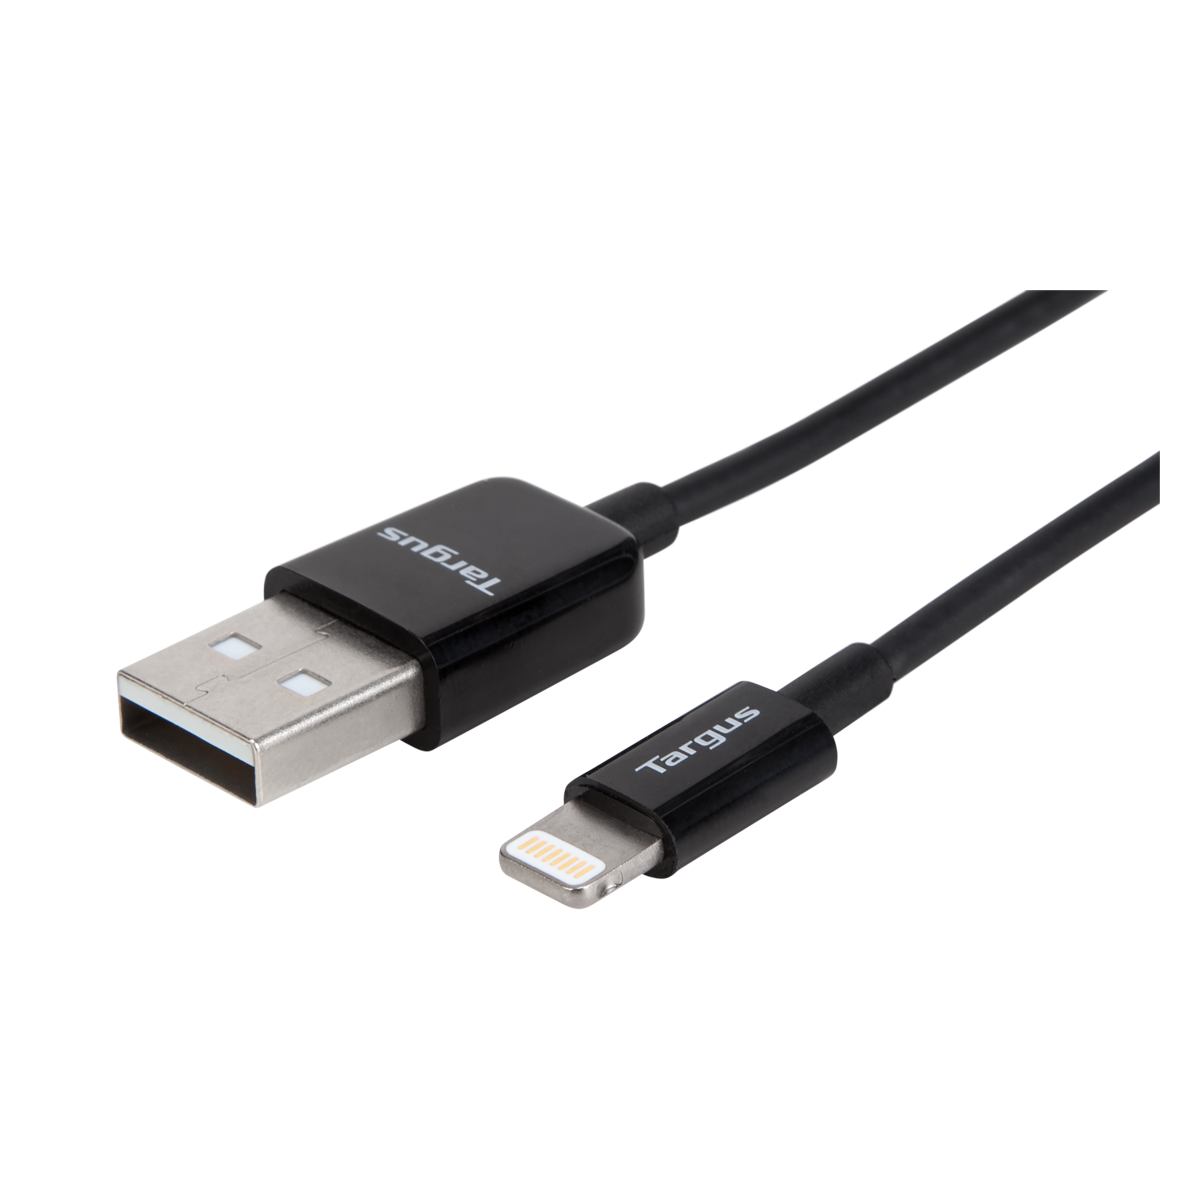
Using a Windows PC
We’ll be using iTunes to transfer the iOS data. Even though iTunes has been discontinued with the latest versions of iOS, this method still works to sync devices on Windows. If you don’t have the iTunes app on your PC already, download and install it from the Microsoft Store first.- Let’s back up your old iPhone first – connect your phone to your PC using your iPhone’s Lightning cable.
- Launch iTunes and click Summary on the left-hand side. Under Backups select This Computer then Back Up Now.
- Wait for the back up to be complete and then plug in your new phone to a power source.
- Start up your new iPhone, and tap Set Up Manually on the Quick Start page.

- When prompted, tap Restore from Mac or PC.
- Connect your new iPhone to your computer with a USB cable. You may be asked for your device passcode or to select Trust This Computer.
- Select your new iPhone when it appears in the Finder window or iTunes on your computer.
- Select Restore Backup.

- Select the latest or most relevant backup.
- Click Restore and wait for the restore to finish up.
- Keep your device connected after it restarts and wait for it to sync with your computer.
Using a Mac
It’s even easier to transfer a backup to your new iPhone on a Mac.- If your Mac works on macOS Catalina or later, open the Finder app and select your iPhone from the sidebar on the left.
- Select Back up all of the data on your iPhone to your Mac and hit Back up now.
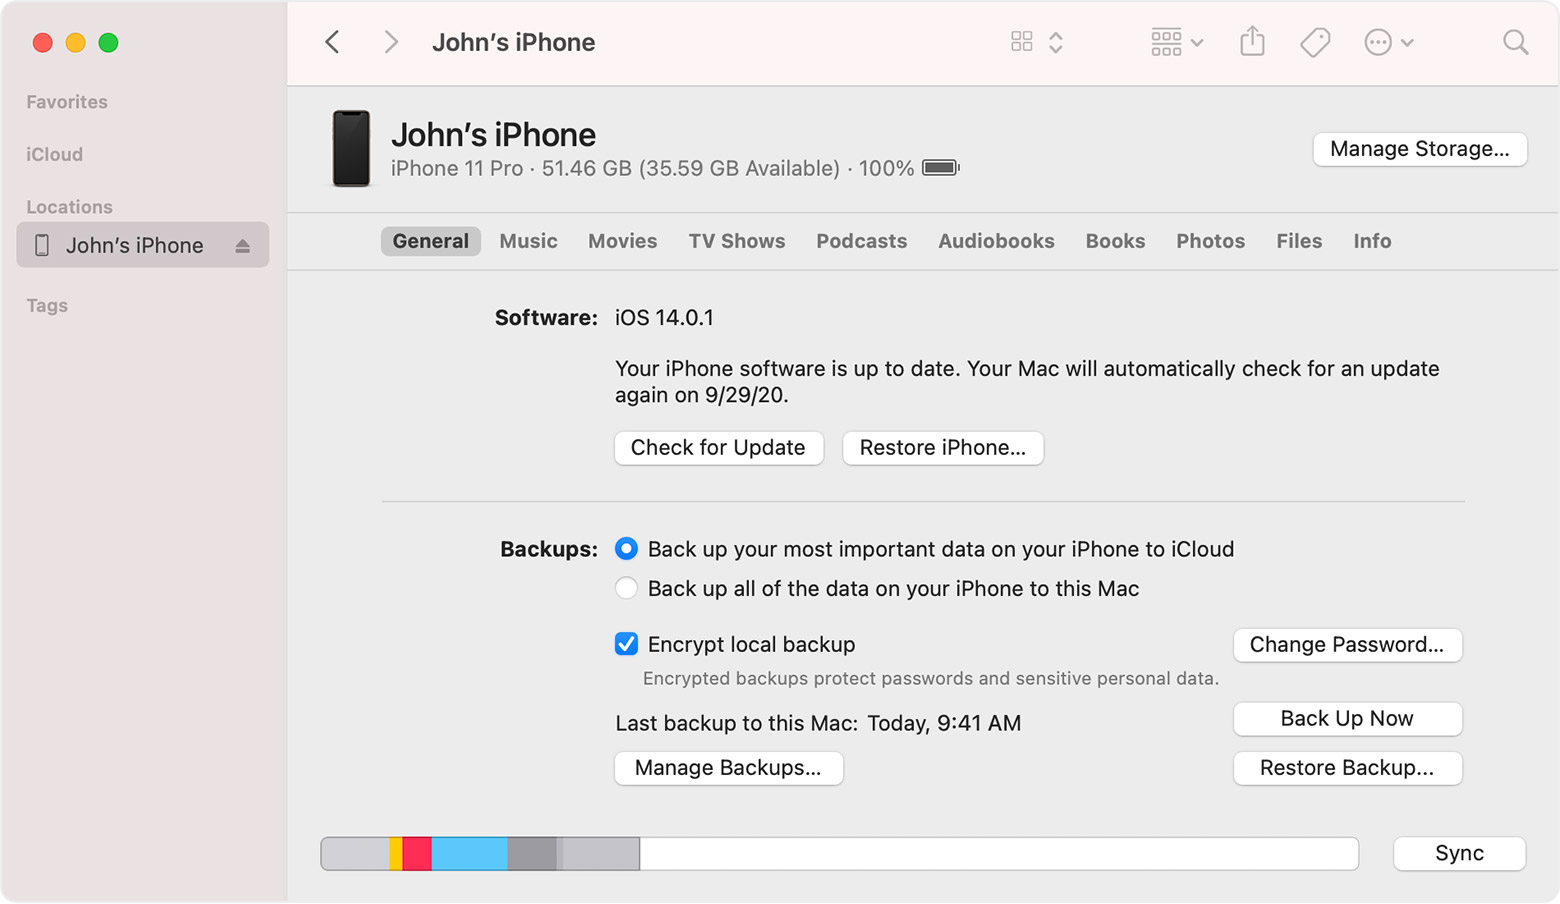 Image Credit: Apple
 - Connect your new iPhone to your Mac using a Lightning cable.
- Start up your new iPhone, then tap Set Up Manually on the Quick Start page.
- Follow the on-screen instructions until you reach the Apps & Data screen and tap Restore from Mac or PC.
- Sit back and smile knowing your digital life is reincarnating into a new and improved model!
Always Put Your Digital Safety First!
 Transferring your iPhone’s data over to a new device needn’t be traumatic. Just remember to back up your data and restore factory settings on “old faithful” before you pass it on, so the next guy can’t follow your tracks.
Now you’ve figured out how to transfer data from iPhone to iPhone, maybe you’d like to learn about how iPhone VPNs work or how to tell if your iPhone’s been hacked.
Transferring your iPhone’s data over to a new device needn’t be traumatic. Just remember to back up your data and restore factory settings on “old faithful” before you pass it on, so the next guy can’t follow your tracks.
Now you’ve figured out how to transfer data from iPhone to iPhone, maybe you’d like to learn about how iPhone VPNs work or how to tell if your iPhone’s been hacked.
FAQ
Can I transfer data from iPhone to iPhone wirelessly?
Sure you can. If you have both iPhones on hand, the easiest way to transfer your data wirelessly is with Apple’s Quick Start tool. Our guide explains how to transfer data from iPhone to iPhone, in a few steps. If you can’t get the phones together, just back up your data to iCloud first. You’ll find out how to do that here too. If your data matters to you, protect it with CyberGhost VPN. We encrypt all the data that leaves your iPhone to make sure no one can spy on, exploit, or steal your information.
How do I transfer everything from my old iPhone to my new iPhone?
You can do it using Apple’s Quick Start tool when you start up your new or newly erased iPhone. All you need is your old iPhone or a backup of your old iPhone on iCloud or on local storage like a PC or Mac. Read our full article for 4 easy and safe ways to transfer everything from your old iPhone (or iPad) to your new device. If you get stuck, reach out to our friendly 24/7 Customer Support team via email or live chat. We’re always happy to help answer any technical questions you may have.
Can I transfer my old iPhone data to my new iPhone with a PC or Mac?
You bet! All you need is your iPhone’s Lightning cable and a computer with the relevant port. On PC, you’ll need iTunes installed to back up your data and access your backup on your new phone. On a Mac, you can use the Finder window to locate your iPhone and back it up, and then restore the backup to your new device. Once you’ve moved your data safely across to your new device, keep it safe with CyberGhost VPN. Take advantage of our 45-day money-back guarantee to see for yourself how our private encrypted VPN tunnel secures your iPhone 24/7.
How do I completely wipe the data from my old iPhone?
To wipe your iOS device: 1. Go to Settings, then to the General sub-menu 2. Choose the Reset option or the Erase All Content and Settings function 3. Enter your Apple ID password and continue It can take a few minutes to completely erase your data. You’ll know the reset was successful when your device restarts with the “Hello” introductory screen. Welcome back to a clean slate!
Leave a comment