Digital decluttering is much easier than cleaning your room – and removing junk files will probably make your computer perform better.
Although Windows and macOS have OEM apps that make the process easier, they’re limited in what they can do. Manual decluttering might not be as fast, but it’s also not that complicated – you just have to find the scrap and get rid of it.
When it’s so easy to remove junk files, why not declutter your computer to increase its performance? In this article, I’ll show you how.
First things first.
What Are Junk Files?
We may call them junk files, but this data once served a purpose. When you open an MS Word document, view images online, or install software on your device, your operating system creates temporary files on your machine to help with those tasks.
The reason why the files are junk now is that they no longer have a use. The system may program some of them for auto-deletion, but this process isn’t always successful.
Junk files tend to accumulate. If you’re performing a clean Windows installation or any other kind of manual system configuration, you should always leave loads of spare room in the system drive. It’s not just temporary files and soon-to-be trash docs that get stored there, but also system updates and patches for other apps.
The good news is that you can easily erase system junk and give your device a clean slate to work with.
What File Types Are Considered Junk?
Before we start deleting things left and right, it’s vital to understand what file types are actually junk. This way, you won’t delete something crucial to your system. Here are some examples of junk files you can look out for:
Random executables (.exe for Windows or .app for Mac). These are necessary to install software. Once the program is set up, you don’t have to keep them around.
Deleted Files. I’ve yet to find an operating system that doesn’t have the equivalent of a recycle bin or trash folder. This is where files go when you first delete them, and it’s a convenient feature, especially if you’re like me and you sometimes delete things you shouldn’t.
Some users don’t give deleted files a second thought, but these docs remain on your hard drive (and, as a result, still take up space) until you clear the bin. Just make sure to double-check you don’t need something before you throw it out of the old trash can.
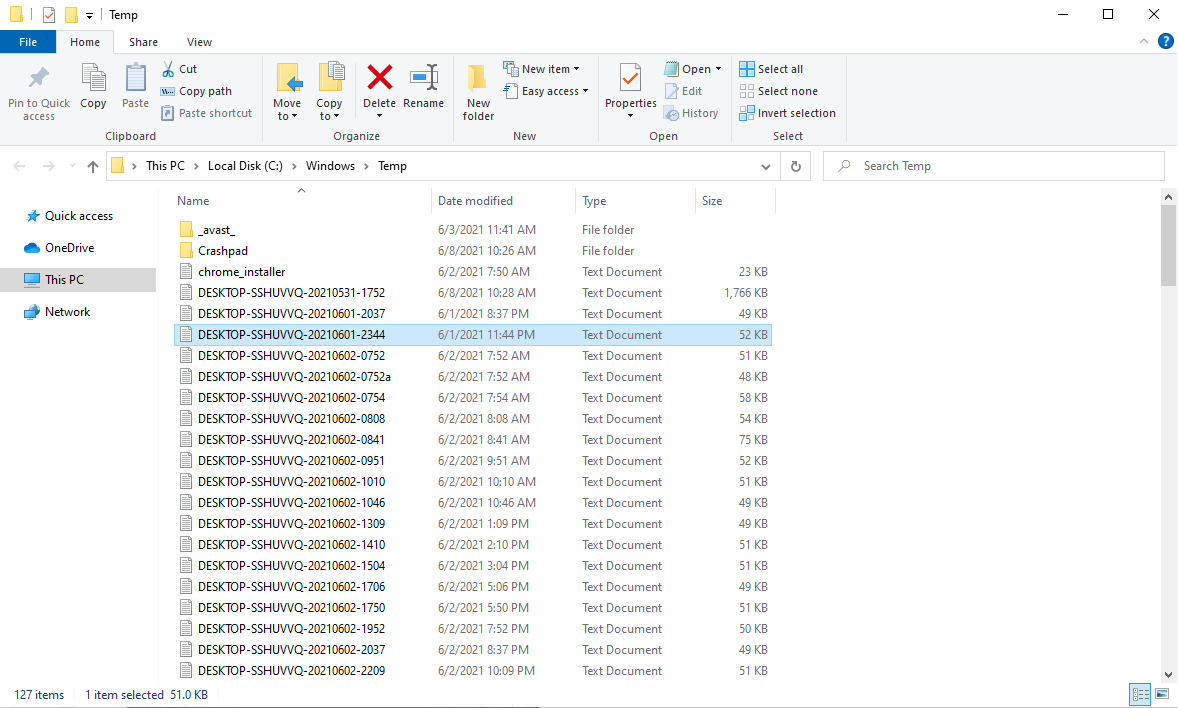
Temp Folders. These are workspaces where software can create temporary files it needs while running. The apps are supposed to delete the docs when they’re done using them, but this doesn’t always happen – I’m looking at you, Windows Update.
Even Microsoft devs recommend you manually clean the temp folders once in a while. Don’t delete the folders themselves, however. Only delete the contents.
Temporary Internet Files. Browser cache and cookies fall into this category. Although they get a lot of hate, the two make browsing a faster, better experience. Is this always the case? No.
It’s not just shady companies that use internet cookies to get valuable customer data. The web is crawling with malicious third parties looking for an easy way to steal your personal information.
Software Leftovers. You can imagine that if an app can’t always delete the temporary files it creates, it probably won’t be able to fully remove itself from your system, either.
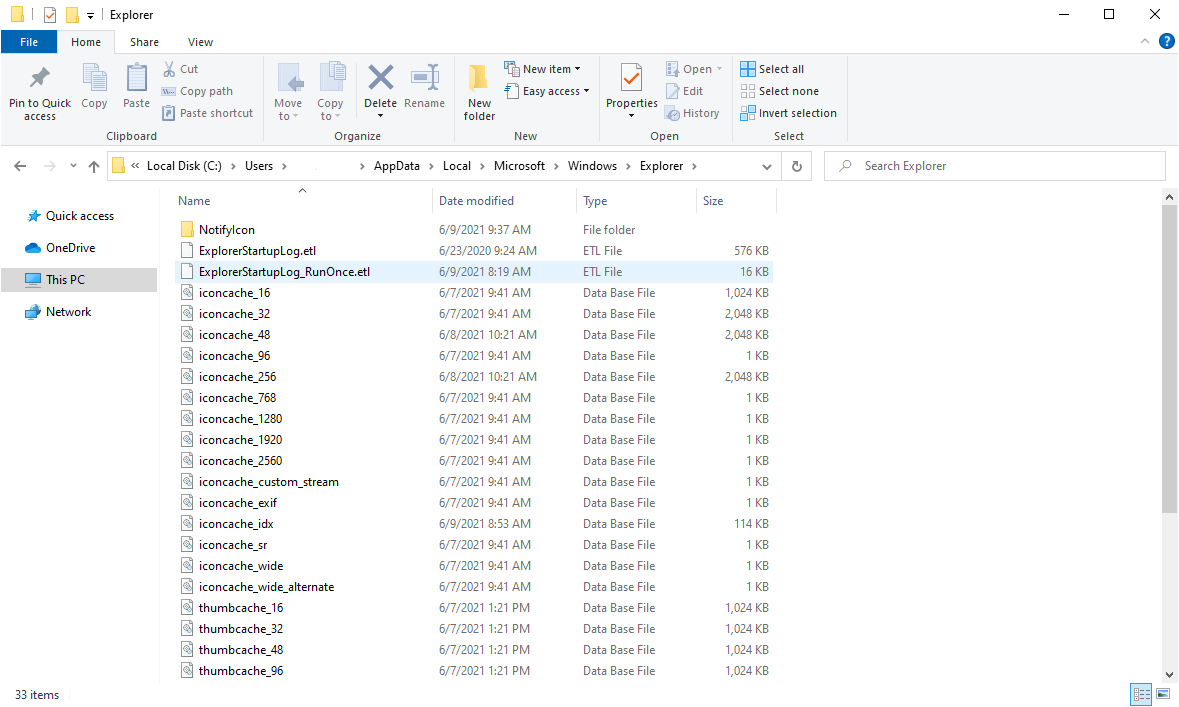
Thumbnail Cache (Windows). Thumbnails let you see a preview of the images stored in a folder while browsing your files. Aside from giving you an idea of what’s in the pic without opening it, thumbnails also speed up the process of loading images when you do view them.
Log Files (Mac). Mac generates system and user log files. These are intended to help developers better diagnose application or system errors.
Language Files (Mac). Because a lot of apps install language files for several languages at once, they can take up quite a bit of space on Macs. Once you’ve selected your preferred language, you can get rid of the rest.
Xcode Scraps (Mac). This is a major source of impaired system performance on Macs since Xcode generates (and fails to delete) a lot of cached files. If you’re not a developer and you’ve never used Xcode, this doesn’t apply to you.
Is It Safe to Delete Junk Files?
Junk files are generally safe to delete. Many of them should be deleted once in a while, and doing so will likely improve your device’s security. However, if you want to stay on the safe side, you can rely on built-in cleanup tools.
Ideally, you shouldn’t mess with temporary folders when applications are running. Doing this can cause unexpected errors, although most have a failsafe for when they’re in use.
Windows and macOS have disk utility cleanups you can rely on to easily get rid of some trash. Neither is particularly thorough, but they’re easy to use.
How to Remove Junk Files Automatically?
You can use manufacturer software to safely remove junk files in a matter of clicks. It’s not as thorough as it can be , but at least it’s easy to do.
Remove Junk Files on Windows
To open Windows’ Disk Cleanup feature, just type “Disk Cleanup” in the Windows search box.
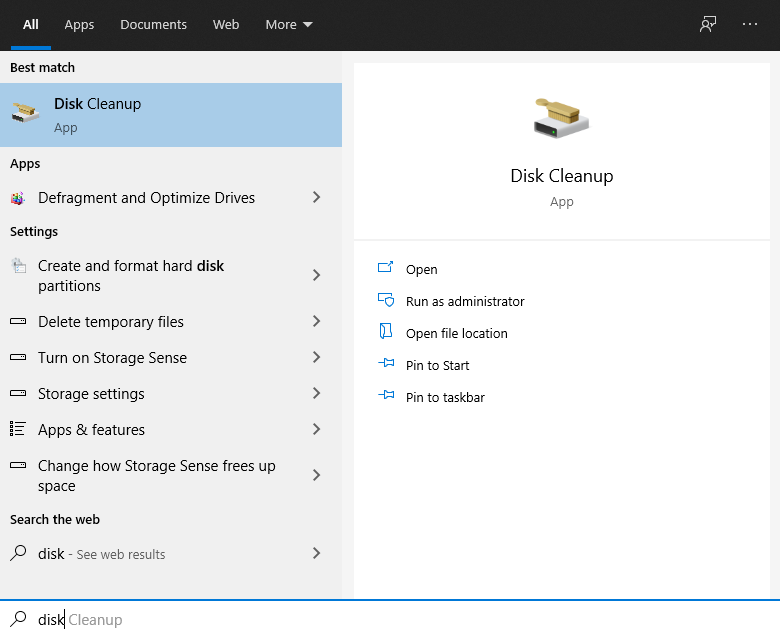
Open the app and select the drive you want to clean. The system drive (C:) usually has all the temp files.
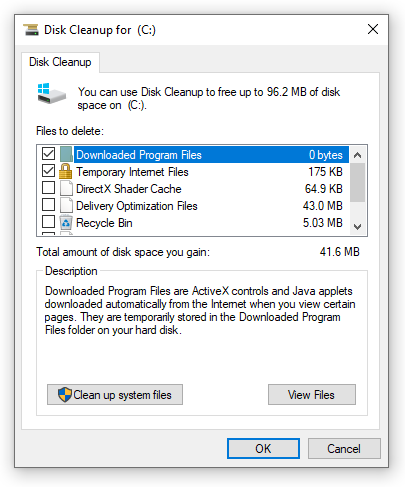
Tick all of the boxes under “Files to delete”, and press OK. For good measure, you also have an option to “Clean up system files,” which will get rid of unused, temporary docs associated with graphics processes.
Remove Junk Files on macOS
Mac-based machines, like MacBooks, iMacs, or those expensive MacPros, have an Optimize Storage option.
Optimizing your storage might not do much, but it’s a handy way to get rid of files you no longer need. To get to it, open the Apple menu, go to “About this Mac,” select “Storage,” and then click on “Manage.”
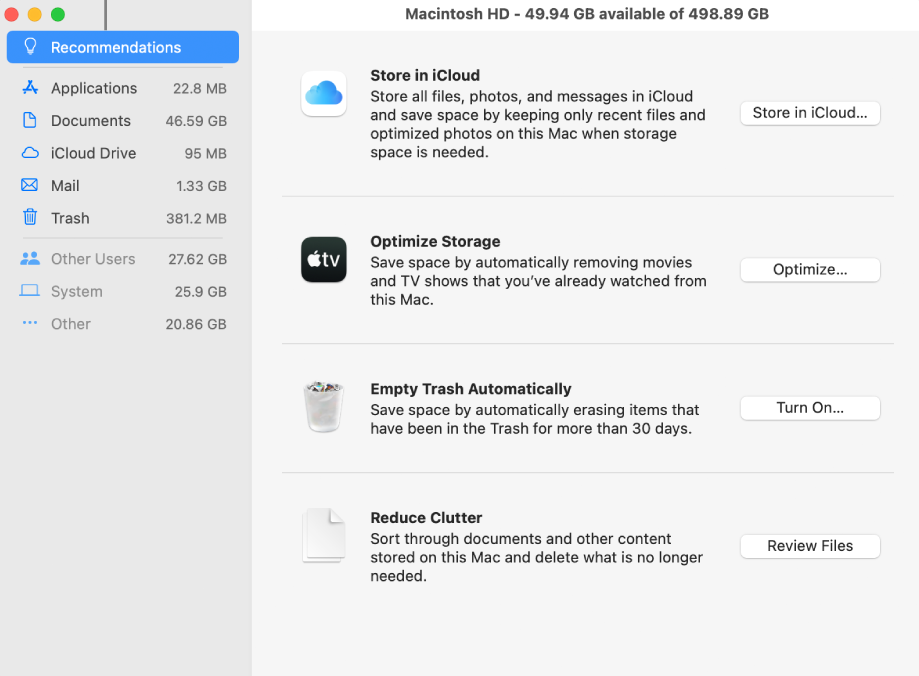
You should have a list of several recommendations, including the ability to store in iCloud, empty trash, optimize storage (by deleting movies and shows you’ve watched, of all things), or reduce clutter.
The good news is that macOS automatically removes a lot of junk files so you don’t normally need to declutter things yourself. For a slightly more thorough cleanup, you can boot in Safe Mode, which gets rid of system caches, font caches, and certain temporary files.
Remove Browser Junk Files
The easiest way to delete browser cache and cookies is from the application itself.
In Google Chrome, click on the Menu button (three-button icon in the upper-right corner), go to “More Tools”, and then select “Clear browsing data…” from the drop-down menu. A new window will pop up, and you’ll be able to choose what junk you want to get rid of.
For Firefox, click on the Menu button (three-line icon in the upper-right corner), go to “History”, select “Clear Recent History,” and then make sure you get rid of (at the very least) cache and cookies.
For Chrome or Firefox, CyberGhost VPN offers a handy Cookie Cleaner that puts you in control and doesn’t require you to look through advanced settings.
For Safari on macOS, you should first enable the Develop menu. To do this, click the Safari menu button, go to the “Advanced” tab, and tick the “Show Develop menu in menu bar” box.
Afterward, you can click on the Develop menu in Safari and select “Empty Caches”. That’s it.
Is Automatic Decluttering Thorough?
Unfortunately, neither of the two system cleanup options above will get you very far. The macOS feature isn’t as powerful as the Windows one, even when you count the built-in purge mechanisms. Although true, it still feels odd to say.
You can rely on a lot of third-party apps for decluttering your system, but trustworthy vendors aren’t that easy to come by. As long as BleachBit is updated, it’s a great way to get rid of all the junk on Windows and macOS with a couple of clicks.
That said, you can also manually delete scrap from your macOS or Windows computer. Read on to find out how.
How to Remove Junk Files Manually?
Manual junk file removal and maintenance isn’t that hard if you know where to look, as they’re not all in one place.
On Windows. The most straightforward way to locate junk files on Windows is to use the Run command window. Bring it up by pressing Windows Key + R or by typing “Run” in the Windows search box.

In the Run window, type and hit Enter after each of these:
-
-
-
-
- “softwaredistribution”
- “prefetch”
- “temp”
- “%temp%”
-
-
-
This will open all of the folders with temporary files. Once you’re there, just select everything, hit the delete button, and enjoy the serenity of a clean slate.
If you’ve got any problems with the Windows Store, you can use the “wsreset” command.
On macOS. Fire up Finder, which behaves similarly to Windows’ Run, with Command+Shift+G.
First, go to the “~/Library/Caches” folder. This is where app files are usually stored.
For macOS log files (system and user logs), use Finder to open:
-
-
-
-
- “/var/log”
- “/Library/Logs”
- “Library/Logs/DiagnosticReports”
- “~/Library/Logs”
-
-
-
For no longer used language files, you’ll have to go through each app under the “Applications” tab. Right-click the application, select “Show Package Contents,” and then go to the “Resource” folder.
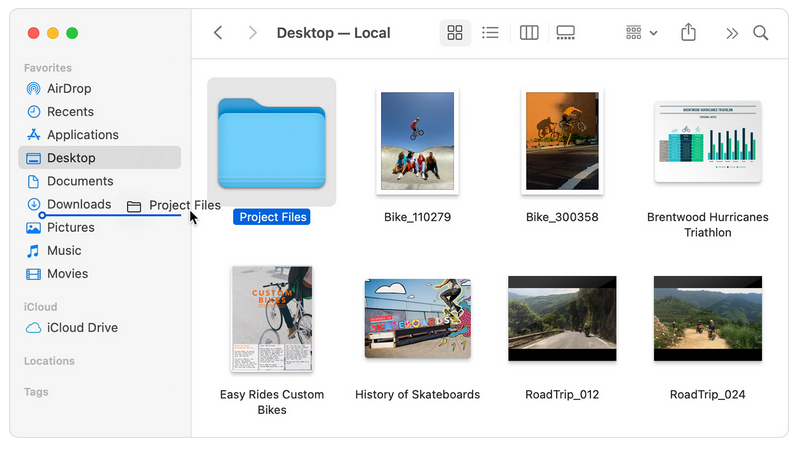
If, in any of the files, you find the “.Iproj” ending, they’re language packs. Only the ones associated with the language you’re currently using (for instance, the English ones are in “en.Iproj”) are necessary.
Lastly, macOS devs who use Xcode should regularly clean the app’s cache, which can be found under:
-
-
-
-
- “~/Library/Caches/com.apple.dt.Xcode”
- “~/Library/Developer/CoreSimulator”
- “~/Library/Developer/Xcode/DerivedData”
- “~/Library/Developer/Xcode/Archives”
- “~/Library/Developer/Xcode/iOS DeviceSupport”
- “~/Library/Application Support/MobileSync/Backup”
-
-
-
An important note: I wouldn’t venture into deleting Xcode leftovers unless you absolutely know what you’re doing. You could cause bugs or even break some of the libraries.
As is the case with Windows, open all of the folders above, select everything, and hit delete to declutter your macOS. Once you’re done shipping all the junk to the Trash/Recycle Bin, don’t forget to empty it.
Will Junk Files Come Back?
YYes, junk files do come back. Don’t feel bad about it though, since you need most of them for your computer or device to run properly. They only become junk when they outlive their use.
The best way to deal with clutter is to treat our devices like we do our living spaces: regular cleanups help keep things nice and tidy. Aside from taking out the trash, you should also delete software and files you no longer use or that are duplicates.
One thing to keep in mind is that you could accidentally remove essential system files. As such, it’s always a good idea not to delete something if you don’t know for sure it’s junk. Fortunately, you can now rely on automatic disk cleanup utilities to safely get rid of useless docs.
How often do you clear your temporary folders, and did you ever break your Windows by deleting entries in the Registry Editor? I know I did – I had to reinstall Windows XP… once or twice. Sometimes, you learn the value of caution and backups the hard way.
FAQ
Deleting your browser cache every couple of weeks or so should be fine. Nothing says you have to do it more or less often than that, so you can choose an interval that fits you best.
Browser cache isn’t the same thing as internet cookies, so your login details should be safe whether you clear your cache or not. If you haven’t done it in a long time, a cache cleanup can improve your browser’s performance.
Don’t delete files outside of junk folders or that aren’t leftovers from already removed software.
With today’s tech forums, you can also look up specific file names in any search engine, and learn what that file does and if it’s essential.
If you want to stay on the safe side, use the recommended system tools.
You can safely delete log files across most operating systems and devices. I usually leave them in the Recycle Bin for a couple of weeks, just in case.
For work-related tasks and devices, I recommend you make a regular backup of the most important log files.
If you know what’s using that file (i.e.,an open instance of MS word will typically be using a Word doc), the easiest way to delete a file in use is to shut down the software and try again.
Sometimes, the application will show an error, in which case you might want to force-quit the process. In Windows, you can easily do this from the Task Manager interface.
If you don’t know what process is responsible, Windows Resource Monitor does the trick. Bring it up by looking for Resource Monitor in the Windows search box or by typing “resmon” in the Run command window.
Go to the “CPU” tab of the Resource Monitor and type in the file/folder name in the box next to “Associated Handles.” That should tell you which process is to blame, and you’ll be able to kill it by right-clicking on it and selecting “End Process.”


Leave a comment