
So you’ve built a world worth sharing, set up your server, and invited friends, but they’re staring at a connection error. Minecraft port forwarding tells your router which computer should receive incoming connections to your server. If the server works on your computer, your router may need a little direction before it lets your friends in.
For a dedicated Java Edition server, this typically means forwarding TCP port 25565 to the computer hosting the game and allowing the connection through the firewall.
Java and Bedrock editions use different server software and network ports, so the setup matters. If you’re hosting a Java Edition server on your home network using IPv4, getting the router settings right can be the difference between connection errors and finally having your friends join your world.
Quick Guide to Minecraft Port Forwarding
Here’s how to set up port forwarding so friends outside your home network can join. Minecraft Java Edition uses port 25565 by default, but check your server settings before you start:
- Check the server’s port in the “server.properties” file.
- Find the server computer’s local IP address and reserve it in your router’s settings.
- Create a port forwarding rule that sends incoming connections on your server’s port to its local IP address.
- Allow incoming Minecraft server connections through the computer’s firewall.
- Restart the server and ask a friend on a different internet connection to join your server.
Pro tip: When you host a Minecraft server, your public IP address becomes visible to anyone who connects. This can expose your network to unwanted traffic or targeted attacks. Only share your server details with people you trust and consider using additional security measures to reduce risks.
Before You Start
Make sure your Minecraft Java Edition server is working and you have access to your router’s settings. It’s much easier to troubleshoot connection problems if you know the server itself is running.
Prepare Your Minecraft Server
You can skip this step if you already have that part covered. Otherwise, download the official Minecraft Java server software. Bedrock uses a separate dedicated server and different ports, so these Java instructions won’t apply to it.
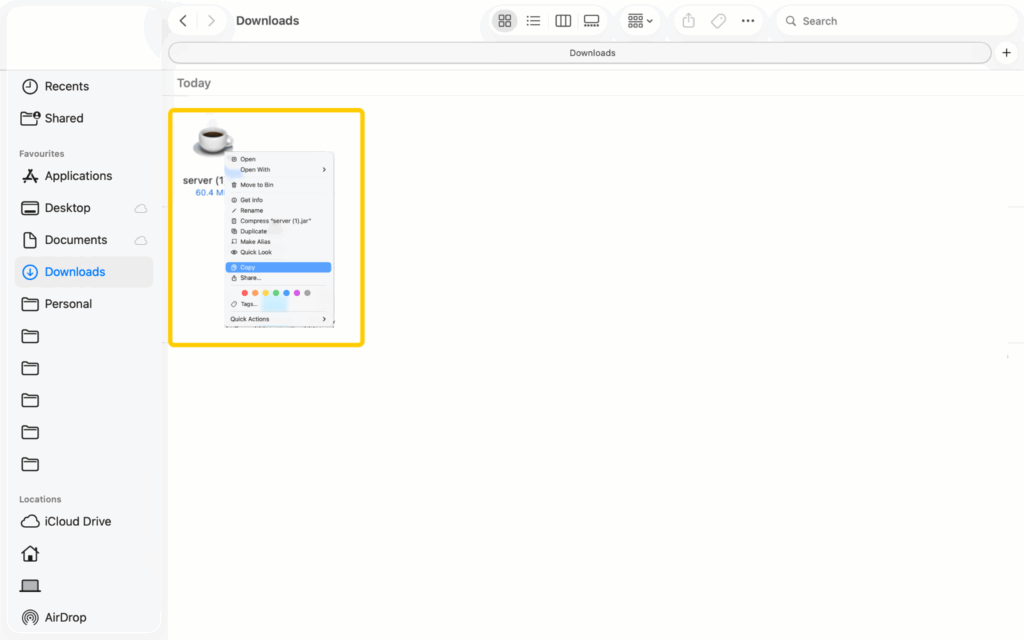
- Install the required Java version for your Minecraft server release. Save the downloaded server file in a dedicated folder and rename it “server.jar.”
On Mac:
On Windows:
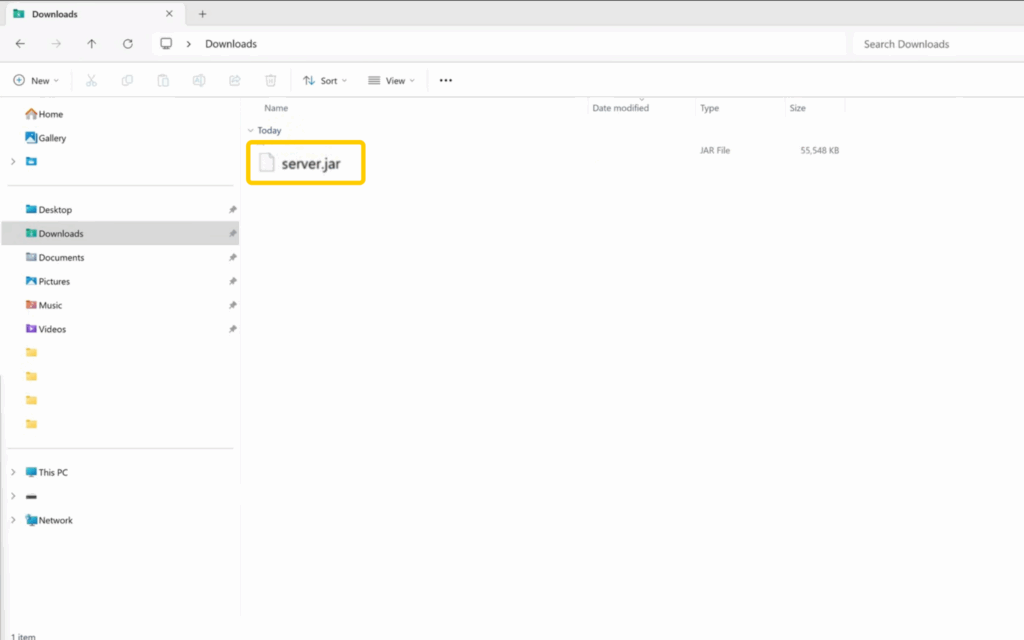
Windows download tab showing a new download from the Minecraft server named server.jar.
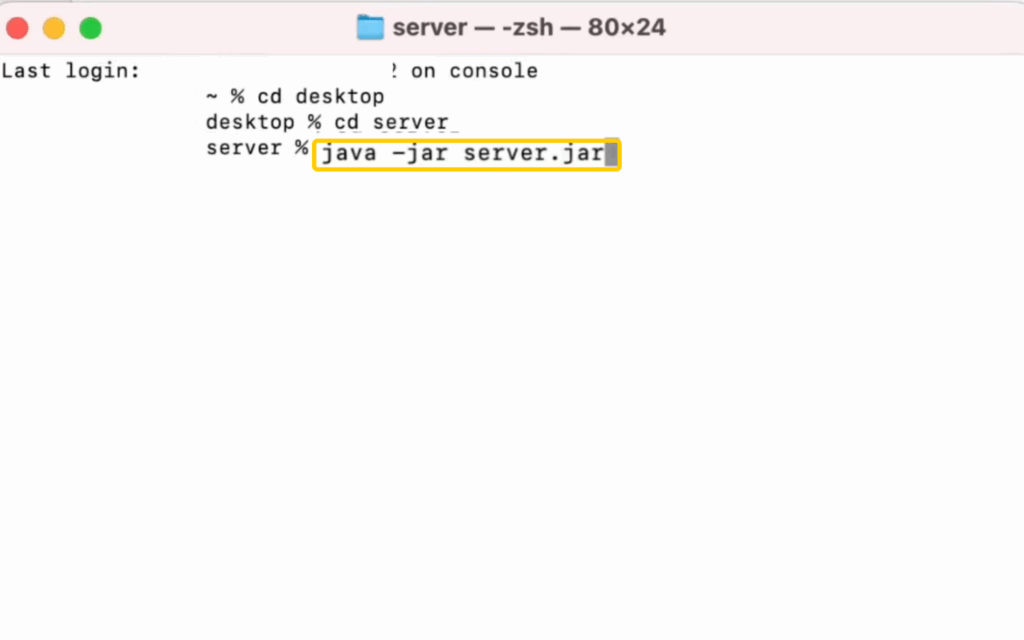
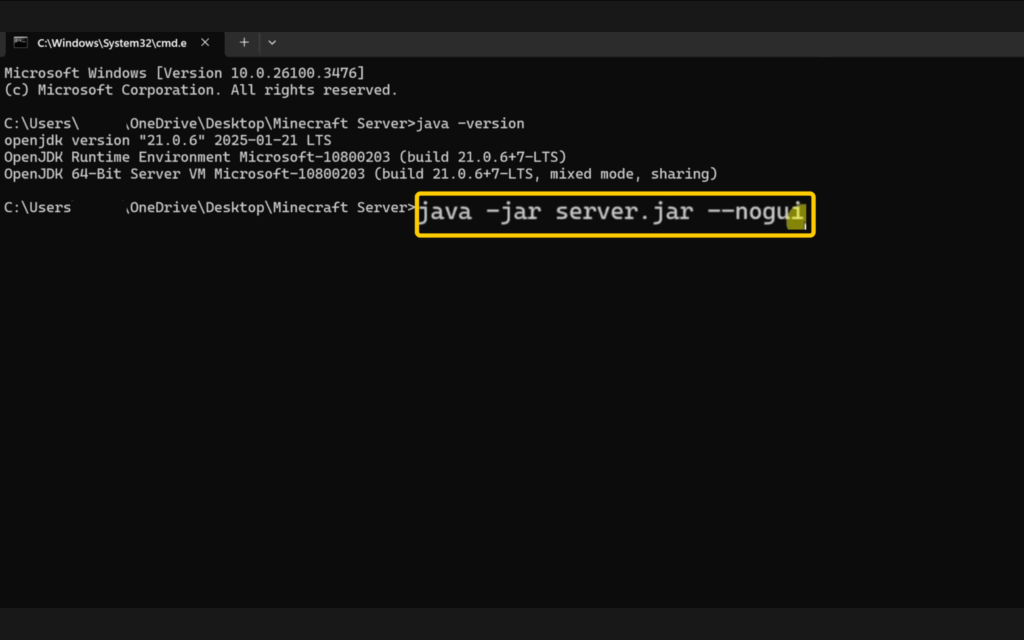
- Open Command Prompt (Windows) or Terminal (macOS or Linux) in that folder. Run “java -jar server.jar nogui.”
On Mac:
On Windows:
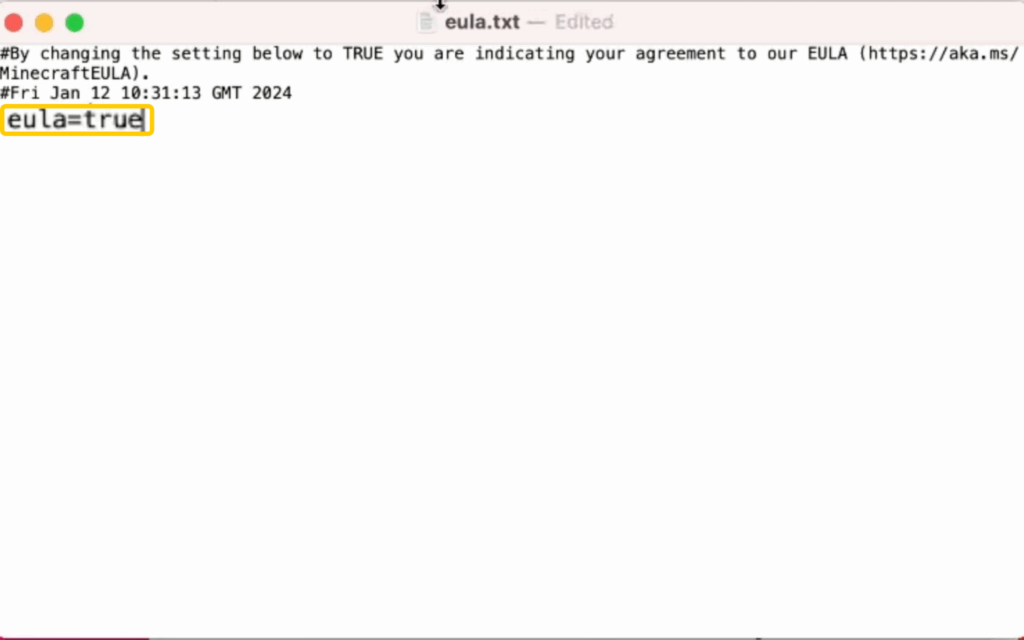
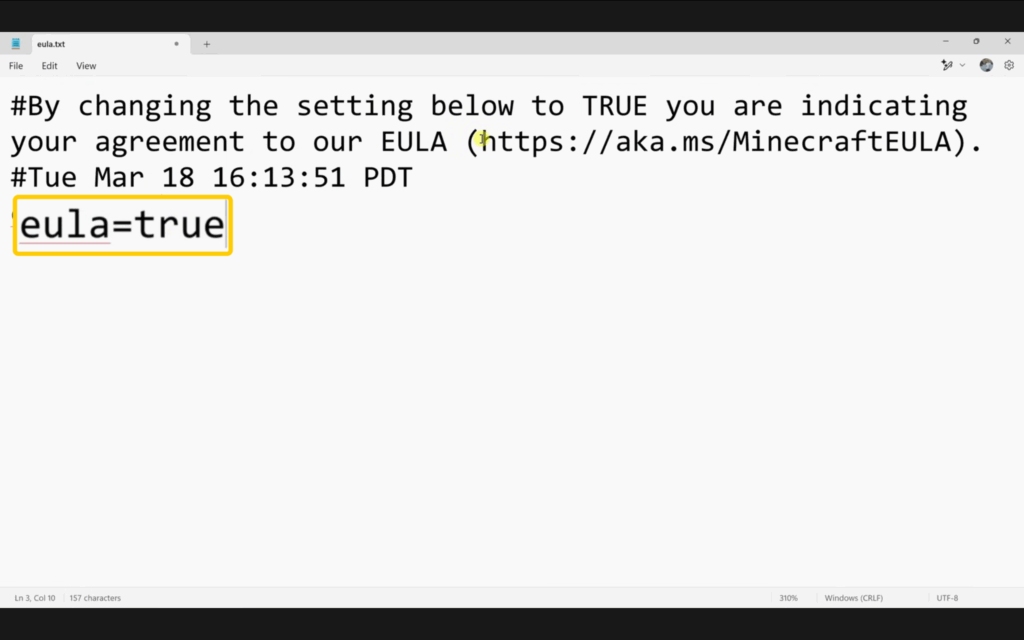
- Review the end-user license agreement (EULA). If you agree to its terms, open the newly created “eula.txt” file, change “eula=false” to “eula=true,” and save it.
On Mac:
On Windows:
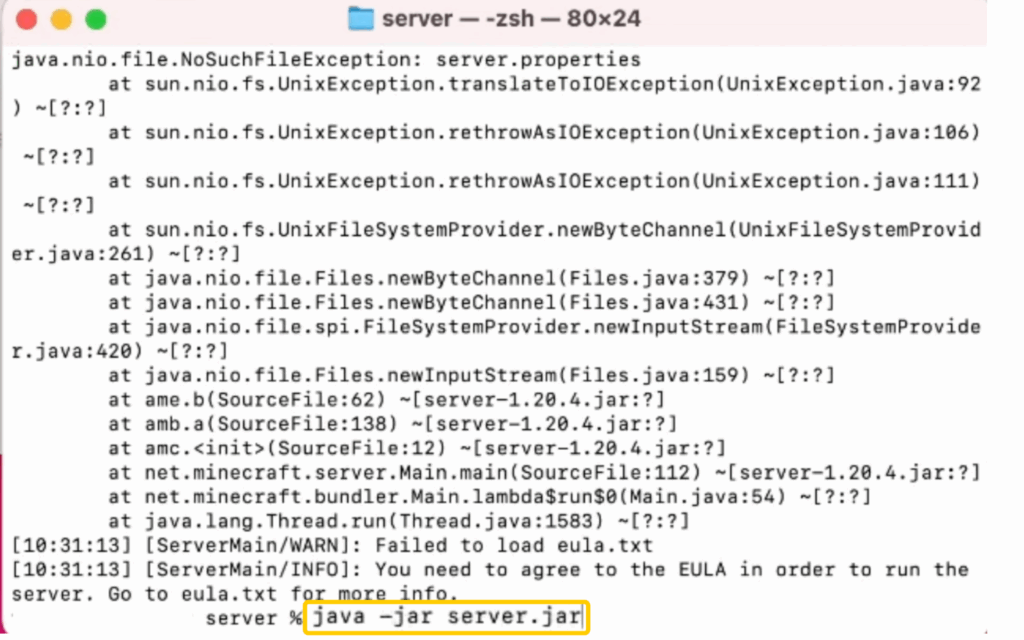
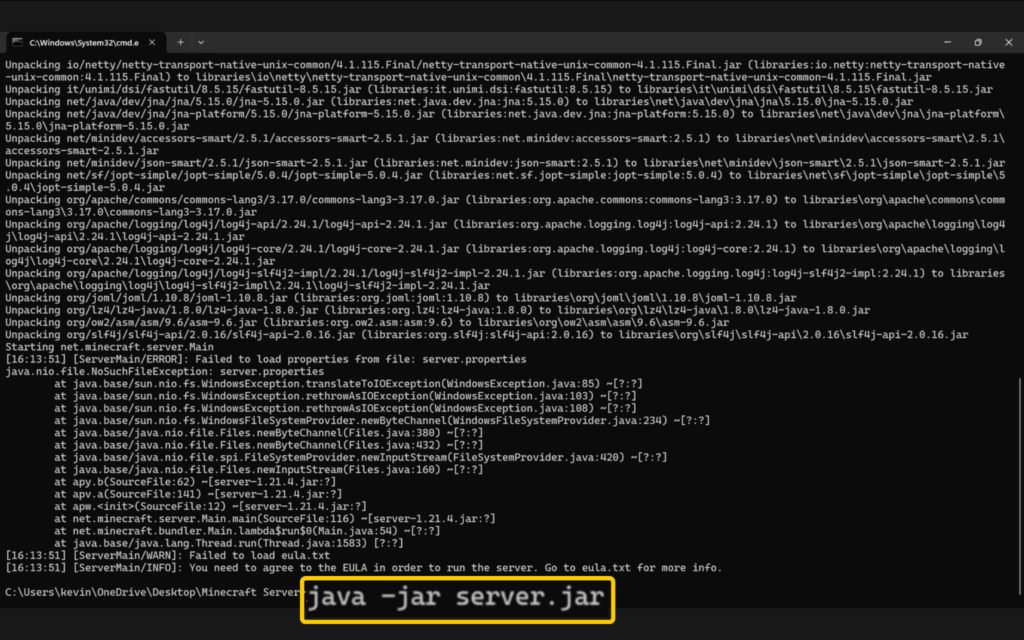
- Start the server again using the same command. Wait until it finishes loading, then check that you can join using a matching version of Minecraft Java Edition.
On Mac:
On Windows:
Check Your Home Network
Before setting up port forwarding, make sure you can access your router’s settings and that your internet connection supports hosting a Minecraft server. If you’re unsure if your connection supports port forwarding, check with your ISP first. You’ll need:
- Router access: Your router’s administrator login details, which may differ from your Wi-Fi password.
- Firewall permissions: Access to firewall settings on the computer running the Minecraft server.
- A public IPv4 address: Your ISP needs to provide a publicly reachable IPv4 address and allow incoming connections. Some ISPs use carrier-grade NAT (CGNAT), which can prevent traditional port forwarding from working.
If you can’t meet these requirements, there are other ways to play. Whichever home-hosting method you choose, your server computer must stay on while friends are playing.
How to Port Forward a Minecraft Server
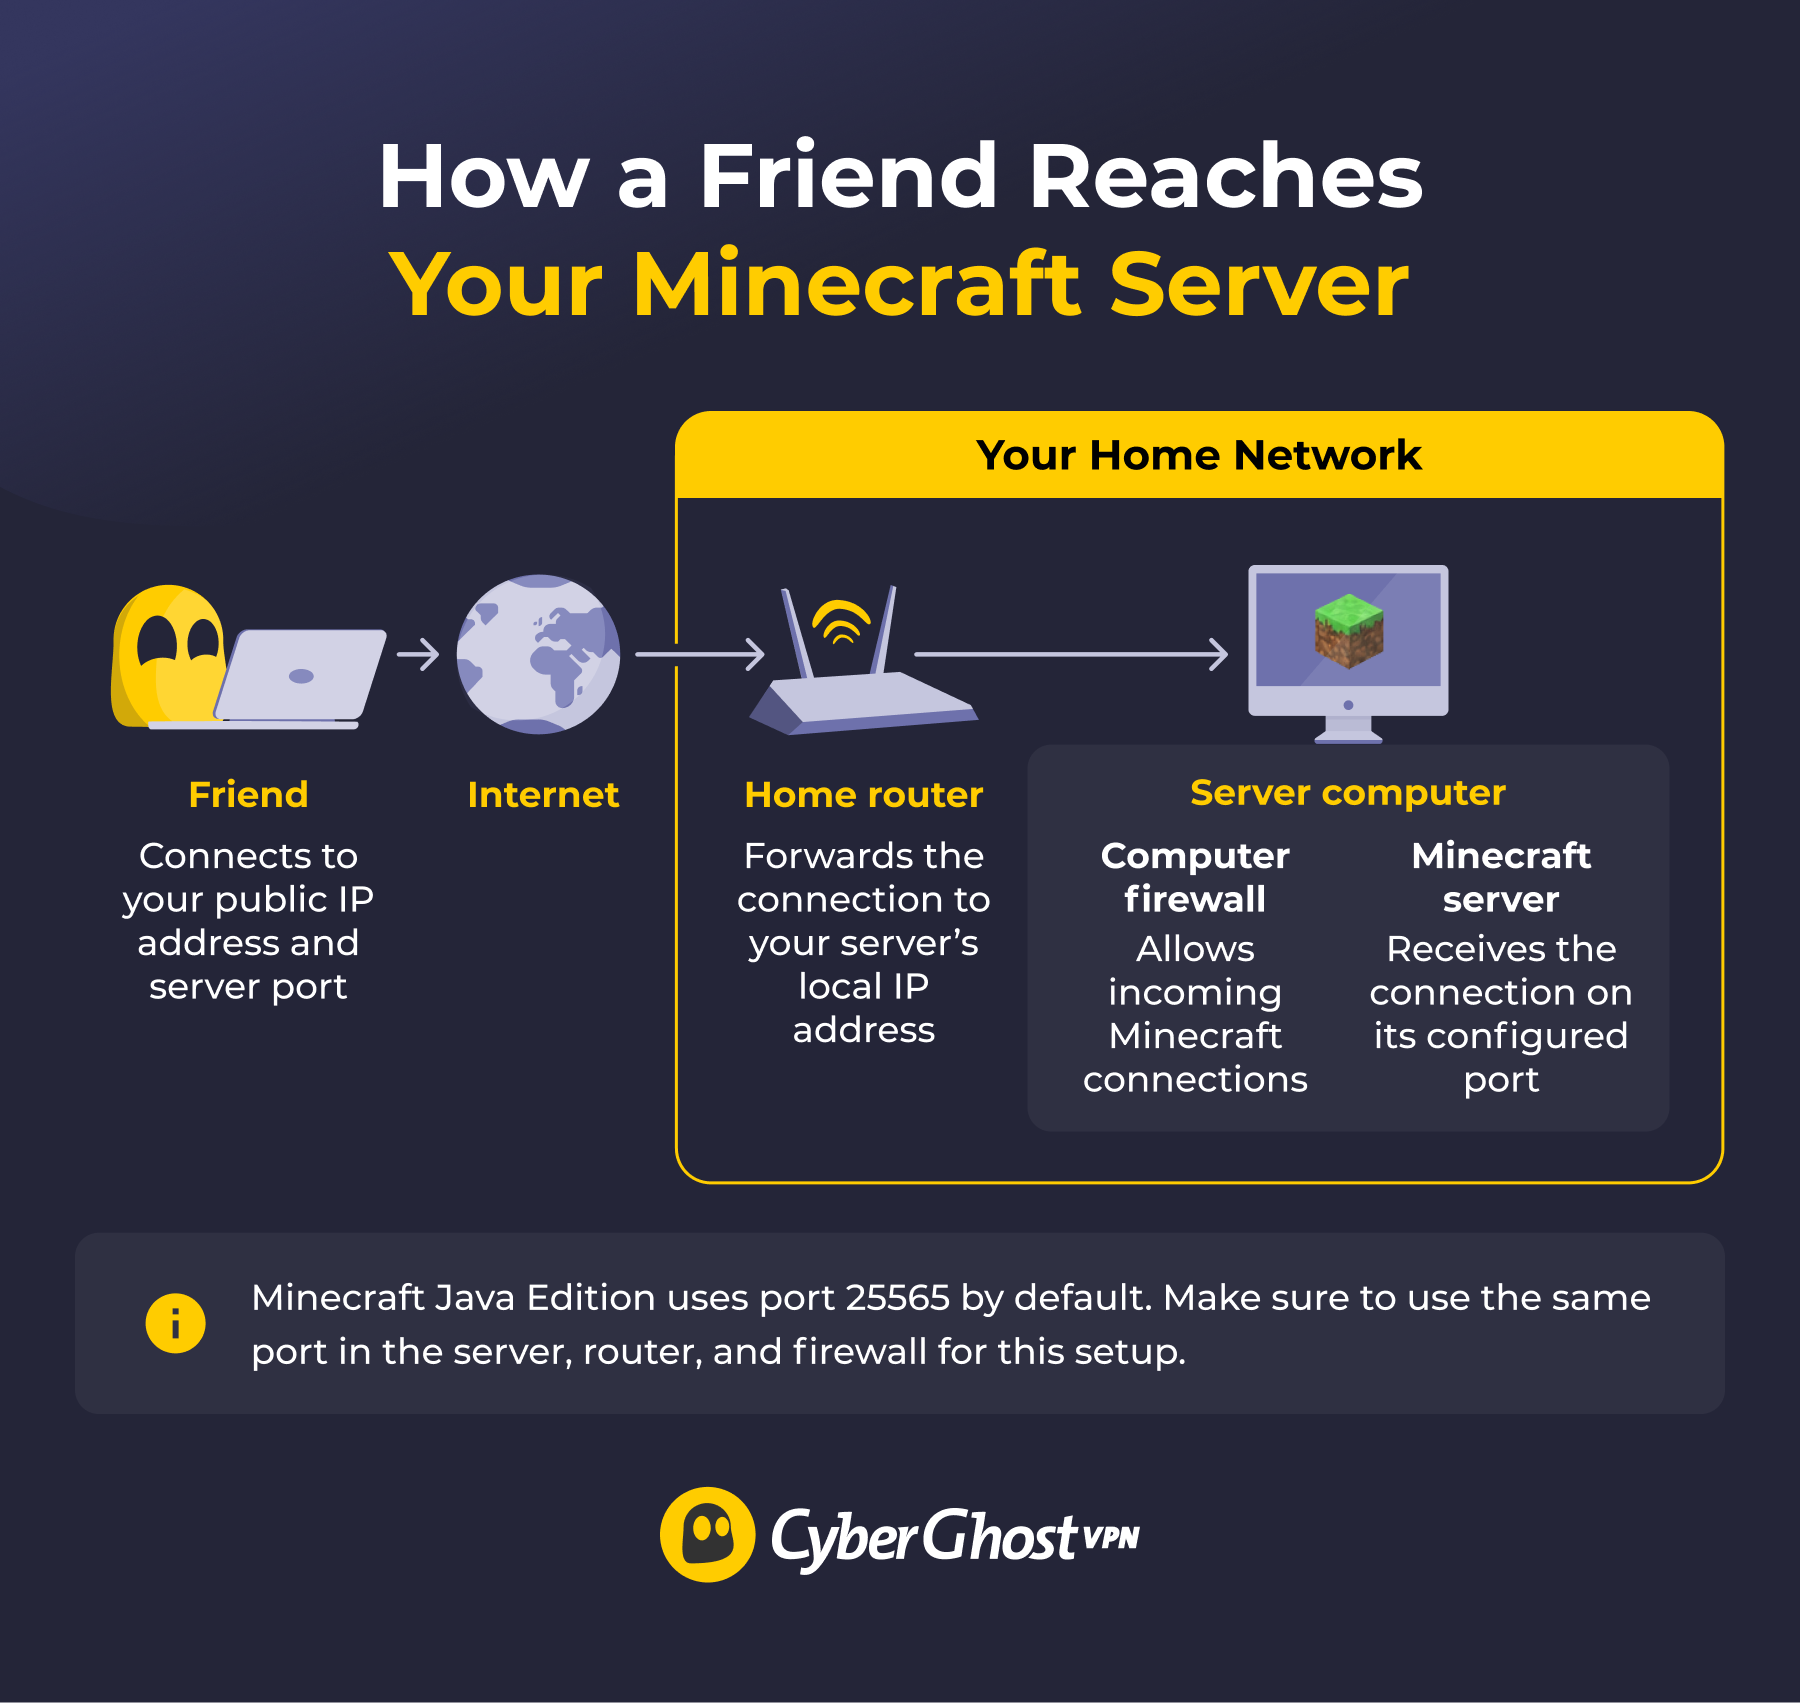
To let friends join your Minecraft server from outside your home, you need to tell your router where to send their connections. You’ll also need to make sure your computer’s firewall allows those connections through. Follow these steps to set up port forwarding and check that it works.
Pro tip: A VPN can add an extra layer of privacy when using port forwarding. While port forwarding allows players to connect to your Minecraft server, CyberGhost VPN can help mask your IP address and make your online activity more private while you host or play. This can help reduce how much you expose of your real network online.
1. Check the Server Port
Standard Minecraft Java Edition uses Transmission Control Protocol (TCP) port 25565 by default, but your server might be configured to use a different one. Check the “server.properties” file before setting up your router and firewall.
- Type “stop” in the server console and wait for it to shut down.
- Search for “server.properties” in your server folder and open it using a text editor.
- Find “server-port=25565” and note the port number. If you’ve changed it, use your chosen port in the following steps.
- Leave “server-ip=” blank for this home setup. You don’t need to enter your public address here.
2. Find and Reserve the Local IP Address
Your router needs to know which computer is running Minecraft. It uses that computer’s local IP address to send incoming connections to the right place. Because this address can change, it’s worth reserving it in your router’s settings. Find it using the instructions for your operating system:
- Windows: Open Command Prompt and run “ipconfig.” Under your active Wi-Fi or Ethernet connection, note the IPv4 address and default gateway. The gateway is normally your router’s address.
- macOS: Open System Settings > Network, select your connection, then open Details > TCP/IP. Note the IP address and router address.
- Linux: Run “ip -4 address” for your local IPv4 address and “ip route” for the router address shown after default via.
Your router can assign the computer a different address later. To keep that from breaking the forwarding rule:
- Enter your router’s local IP address in a browser and sign in as an administrator.
- Find the address reservation settings and select your server computer. Check your router’s manual if the menu uses a different name.
- Reserve its current address and save. If the router asks you to reconnect the computer, double check the address afterward.
3. Add the Router Forwarding Rule
The forwarding rule tells your router where to send incoming Minecraft connections. Menu names vary by model, but you’ll need the local address and port you’ve checked.
- In your router’s settings, open Port Forwarding or Virtual Servers. Check the manual if you can’t find it.
- Add a new rule and name it “Minecraft Java.”
- Enter the server computer’s reserved local IP address as the destination or internal IP.
- Enter your server port, normally 25565, in both the Internal Port and External Port fields. If the router asks for start and end ports, use that same number in both.
- Select TCP as the protocol.
- Enable the rule and save it.
4. Allow Incoming Connections Through the Firewall
Your computer’s firewall must allow the server connection to reach Minecraft. Follow the instructions for the firewall you use. If a security app manages it, you’ll need to change the settings in that app.
On Windows, create a rule for your server’s port:
- Search for and open Windows Defender Firewall with Advanced Security.
- Select Inbound Rules > New Rule > Port.
- Choose TCP and enter your server port under Specific local ports.
- Select Allow the connection.
- Pick the profile your home connection uses. You can check which one is active under Windows Security > Firewall & network protection.
- Name the rule “Minecraft Java” and click Finish.
On macOS, the built-in firewall grants permission to apps:
- Open System Settings > Network > Firewall. Turn the firewall on if needed, then select Options.
- Choose the Java app that runs your server and set it to Allow incoming connections. If you don’t see it in the list, follow Apple’s instructions for adding an app to the firewall.
- Save your changes. If macOS asks whether Java should accept incoming connections when you restart the server, select Allow.
On Ubuntu, if you already use Uncomplicated Firewall (UFW):
- Run “sudo ufw allow 25565/tcp,” replacing the number if you use a different port.
- Check the rule with “sudo ufw status.” An “inactive” result means UFW isn’t filtering traffic, so check whether another firewall is in use.
5. Test the Connection and Invite Friends
Before inviting friends, check that your Minecraft server is reachable. Restart the server and leave it running while you go through these checks.
- On the server computer: Open Minecraft Java Edition, go to Multiplayer > Direct Connection, and enter “127.0.0.1:25565.” Replace 25565 if you’re using a different port.
- From another computer at home: Connect using the server computer’s local IP address and port. This checks whether other devices on the network can reach it.
- From outside your home: Ask a friend on a different internet connection to join using your public IPv4 address and server port. Check your public IP address with any VPN or proxy disconnected so it shows the correct connection.
Only share your public IP address with people you trust. If your friend can’t connect, the results of the earlier tests can help you narrow down the cause.
An online TCP port checker can also check whether the port is reachable while the server is running, but successfully joining a game is a better confirmation.
Minecraft Port Forwarding Not Working?
The first connection test that fails tells you where to start troubleshooting. Work through the relevant checks before adding or changing more rules.
| What’s Happening | What to Check |
|---|---|
| You can’t join on the server computer | Check the server console for startup errors. Confirm the port and make sure the game and server versions match. |
| You can join on the server computer, but not from another device at home | Recheck the server’s local address and firewall permission. Use your main home network, since guest Wi-Fi may block connections between devices. |
| You can join at home, but friends outside your network can’t | Check the router rule’s destination address, port, and TCP setting. Then check the public address and the network restrictions below. |
| Friends can join using your public IP address, but you can’t | Some routers don’t let you reach your own server through the public address. Use its local address while you’re at home. |
| The server stopped working after a restart or network change | Check that the local address reservation still applies. Your home’s public address may also have changed. |
| The port is open, but a player still can’t join | Read the error message. Check game versions, account sign-in, and whether the player is on your server’s allowlist. |
Check for Another Router or ISP Restrictions
If another router or your ISP blocks incoming connections, changing your own forwarding rule won’t solve it. In the router’s status page, look for its internet address, often labeled WAN IP or Internet IP. If it differs from the public IPv4 address you checked earlier, look into these possibilities:
-
- Two routers at home: If an ISP modem-router connects to your own router, incoming connections have to get through both. You may need forwarding rules on both devices. Check the manufacturers’ instructions or ask your ISP to help.
-
- A shared public address: Some providers share one public IPv4 address among customers using CGNAT. You can’t change that through your home router. Ask your ISP whether it can provide a public IPv4 address that accepts incoming connections. There may be a charge for this.
If the provider can’t offer a suitable connection, use one of the hosting alternatives below.
How to Reduce Minecraft Hosting Risks
Port forwarding makes your server reachable from the internet, so keep it updated and control who can join. Anyone you invite will can also see your home’s public IP address, so it’s worth taking a few precautions before sharing your server details:
- Keep software current: Update Minecraft, Java, your operating system, and any server mods or plugins to address known security issues.
- Limit who can play: Keep “online-mode=true” to authenticate players. In the server console, enable the allowlist with “whitelist on” and add each invited player with “whitelist add PlayerName,” replacing “PlayerName” with their username.
- Restrict admin access: Run the server under a standard computer account and give in-game operator privileges only to people who need them.
- Protect your world: Save regular backups so you can recover from crashes, corruption, or unwanted changes. Remove the port forwarding rule when you’re no longer hosting.
An allowlist keeps uninvited players out of your Minecraft world, but it can’t prevent someone from targeting your public IP address with a DDoS attack. If you’d rather not expose your home connection, a managed Minecraft hosting service is another option.
Ways to Host Without Manual Router Port Forwarding
If you can’t set up port forwarding on your router, you still have options for hosting a Minecraft server. The right option depends on whether you want someone else to run the server or prefer to keep it on your computer.
| Option | How It Works | What to Know |
|---|---|---|
| Managed hosting | A provider runs the server. Minecraft Realms is one option, and your computer doesn’t have to stay on. | Usually involves a recurring cost. Check support for your edition and any mods or plugins you want. |
| Public tunnel | A service such as playit.gg gives friends a public address that connects to your server through an app on your computer. | Your server and the app must stay running. Features, limits, and fees vary. |
| Private network | A tool such as Tailscale connects approved devices through a private network. | Players generally need the software and permission to join the private network. Your server still runs at home. |
What about using CyberGhost VPN? If you’re joining someone else’s Minecraft server, CyberGhost VPN encrypts traffic between your device and the VPN server and replaces your public IP address with the VPN server’s address. However, CyberGhost VPN doesn’t support port forwarding, so we can’t make a Minecraft server you’re hosting at home accessible to incoming connections.
Get Your Minecraft Server Ready for Friends
Once your friends can connect from outside your home network, you’re ready to start playing together. Remember to keep your server updated, restrict access to people you trust, and save your router settings in case you need them again.
If port forwarding isn’t an option because of your router or ISP, you can still host a Minecraft world through a managed server, public tunnel, or private network. The important part is finding a setup that works for you, so you can spend less time troubleshooting and more time building.
FAQ
Does Minecraft Java use TCP or UDP on port 25565?
Standard Minecraft Java gameplay uses TCP on port 25565 by default. Select TCP when you create the router forwarding rule. You don’t need a separate UDP rule for friends to join a standard Java server.
What are the risks of opening port 25565?
Opening port 25565 makes the server listening on it reachable from the internet. Outdated software or unrestricted access can put your server at risk. Follow the Minecraft hosting precautions to reduce those risks. Changing the port number alone doesn’t secure the server.
Why can’t friends connect after I’ve forwarded the port?
A firewall block, incorrect address, or ISP restriction can still prevent your friends from connecting. Check your connection to ensure the server is reachable. Open Minecraft Java Edition and go to Multiplayer > Direct Connection, and enter “127.0.0.1:25565” (replace 25565 if you’re using a different port). Also check your router’s port forwarding rule and that it uses the correct port and TCP protocol. Your firewall settings should also allow incoming connections.
Can I host a Minecraft server without port forwarding?
Yes, alternative ways to host a Minecraft server without port forwarding include managed hosting, a public tunnel, or a private network tool. Each of these options involves a third-party service that hosts the server or provides connection assistance. Players on your home network can also connect locally without a router forwarding rule.
Can I use a different port for my Minecraft server?
Yes, you can change “server-port” in “server.properties.” Use the same number in the router’s internal and external port fields and the firewall rule. Restart the server and give your friends your public IP address and updated port number.

Leave a comment